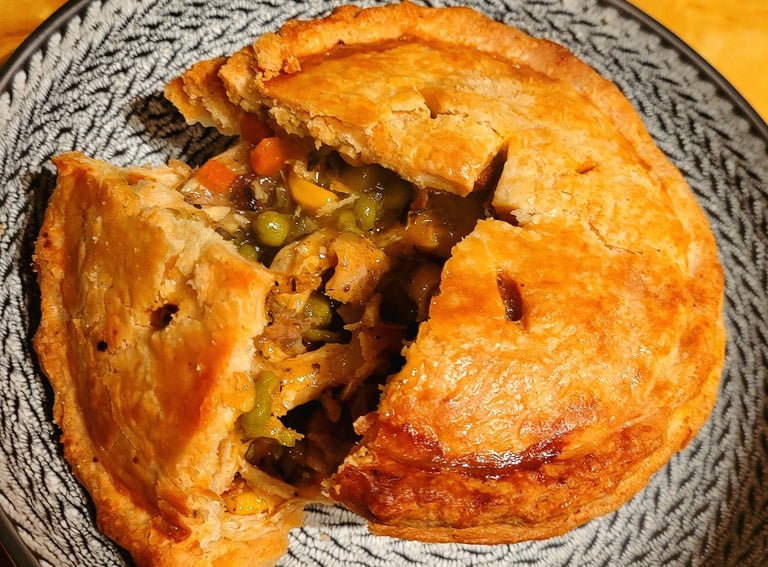
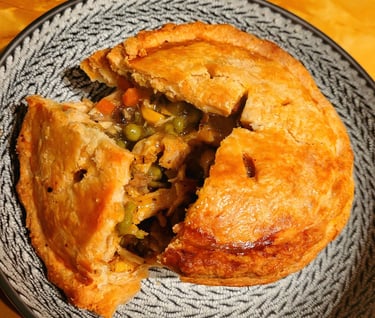
Individual Chicken Pot Pies
Best chicken pot pies you will ever eat!
Flakiest Savory Crust: Yield 12 Individual Pie Crusts (Top and Bottom)
Please note: you can half this recipe to yield the same amount but will have to use the scraps. I prefer to freeze the rest of the dough for spontaneous desserts.
10 cups All Purpose Flour
4 tsp Salt
4 cups Lard
4 cups Butter
2 cups Cold Water
In order to make this dough more manageable to put together, I divided the batches into 4 on my countertop.
Add cubed, cold lard and butter to your flour and salt and use a pastry blender to combine until the butter and lard are pea sized pieces throughout the flour. If you don't have a pastry blender, have no fear because I just used my hands. If you are worried about not mixing it enough, your butter and lard will forgive you and will continue to get more consistent as you add water and roll it.
Once you are happy with your flour/fat blend, slowly add your cold water. You need just enough cold water to pull the dough together.
Next I shaped the dough into 8 discs and popped it in the fridge overnight.
Make sure to let your dough stand out at room temperature for 10 minutes so that it is easier to roll.
Once ready to roll, generously flour your rolling surface and roll to 1/8inch thickness.
For the bottom of the pie, I use the rim of the pie tin and cut an extra inch around in order to give me some extra forgiveness when forming in the tin. For the pie top, just cut tight to the rim of the pie tin. You will need 12 of each size.
Take your rolled out pie dough bottoms and gently but assertively form them into your tin making to cut off any excess from hanging over the rim. Make sure to make sure that your rim is covered though.
Chicken Pot Pie Filling
2 1/2lb Shredded Chicken
14oz Carrot (4 medium carrots)
12oz Celery (1/2 bunch celery)
14oz Yellow Onion (1 large onion)
1lb Russet Potato
1 Bulb Garlic
1 Lemon Zested and Juiced
2Tbsp Vinegar
To Taste Salt
To Taste Pepper
2Tbsp Dried Oregano
1Tbsp Poultry Seasoning
1Tbsp Smoked Paprika
To Taste Fresh Rosemary
To Taste Fresh Thyme
To Taste Fresh Sage
To Taste Fresh Parsley
2L (8cups) Chicken Stock
2/3 cup Cornstarch
1/3lb of Butter
1/4 cup White Wine (optional)
1 12oz Can Corn
1 12oz Can Peas
Olive Oil
Small dice carrot, celery, onion, potato and mince your bulb of garlic. Add all these ingredients to a heated pot or pan that has a drizzle of olive oil. Over low-medium heat, sweat your vegetables after about 5 minutes, add your wine and all of your dry seasonings. Cook until vegetables are just under being cooked to your liking.
Add your chicken stock, lemon juice, zest, vinegar and fresh herbs. Simmer for at least 20 minutes. Everybody has got to get to know each other in the pot before the party can really get started.
Make sure to taste your concoction and adjust the seasoning as needed before you get to the next step.
Make a slurry with 2/3c cornstarch and 1c cold water by combining the two until the cornstarch dissolves and turns the water milky.
Add your slurry to your filling-in-the-making and stir until everything thickens. You want your filling to have the thickness of stew. If it's to loose, it will soak through your pie dough. Compare it to KFC gravy back before it got watered down.
Once your filling is as thicker than a snicker, turn off your heat and add the peas, corn, and butter. Now the party has arrived.
Don't be shy, taste, taste, taste and if you need to add more to the party, do it now.
Now that the hard part is over, put your chicken pot pie filling in the fridge overnight. If you don't cool down your filling before building your pies, it will melt the butter/lard and make your crust soggy.
Assembling Your Chicken Pot Pie
You will need one egg and some salt.
Take your pie tins with the bottoms in them and add as much cooled chicken pot pie filling as it takes for it to be flush with the top.
Beat your egg like it owes you money and grab a pastry brush or use your fingers to brush the egg wash around the edges of the pie dough. This will help your top and bottom crust to seal while it is backing.
Add your top crust dough lovingly on top and before pinching, I like to use my fingers to shape the top around the inner perimeter of the rim so that the filling gets pushed away from where I will be sealing the two layers. Again, this helps for a more even seal.
Next, press the top and bottom layer of dough around the rim and use your thumb to pinch off any overhang.
Crimp your edges and make a few small cuts into the middle of the pie. This is called dough docking and by creating holes with a pairing knife through the top dough layer, it will help steam escape. By steam escaping, it will make sure your crust doesn't puff up and separate from the rest of the pie. One big happy family.
Last step before baking, brush egg wash on the top of your pie crust to get that attractive golden brown crust. And of course I add an extra little sprinkle of salt on top. At this point, you can bake and the rest I freeze unwrapped and once frozen, I wrap or bag them.
Because I roll my pie dough thicker than most people, it needs to bake a little lower and slower in order for everything to get crispy and flaky. I don't support a soggy crust in my world. So I tend to bake at 325F-350F for 45-1 hour. I have an old oven with hotspots so I cook lower temp and make sure to rotate at least once in the over.
Once your pie is as golden and lovely as you like, let it cool for 5-10 minutes and enjoy!
Please note that not all cook times or measurements are exact and will work exactly how everyone likes them so I encourage you to put your own spin on things and make adjustments where needed! Filling and pie dough should be made the day before assembling the pies!
If you would like to see a video of the process, my youtube channel is Lazy Chef B